
Most people who pour a glass of whiskey are drinking it, but they are not actually tasting it. I spent years doing exactly that — tossing back pours without understanding what I was experiencing. The first time I visited a Kentucky distillery and watched a master taster work through a flight, I realized I had been missing an entire world of flavor hiding in plain sight.
Learning to taste whiskey like a distillery pro is not about being pretentious. It is about understanding what is in your glass and appreciating the craft that went into creating it. The techniques distillers use are surprisingly simple once you know them. They just require slowing down and engaging your senses in a specific order.
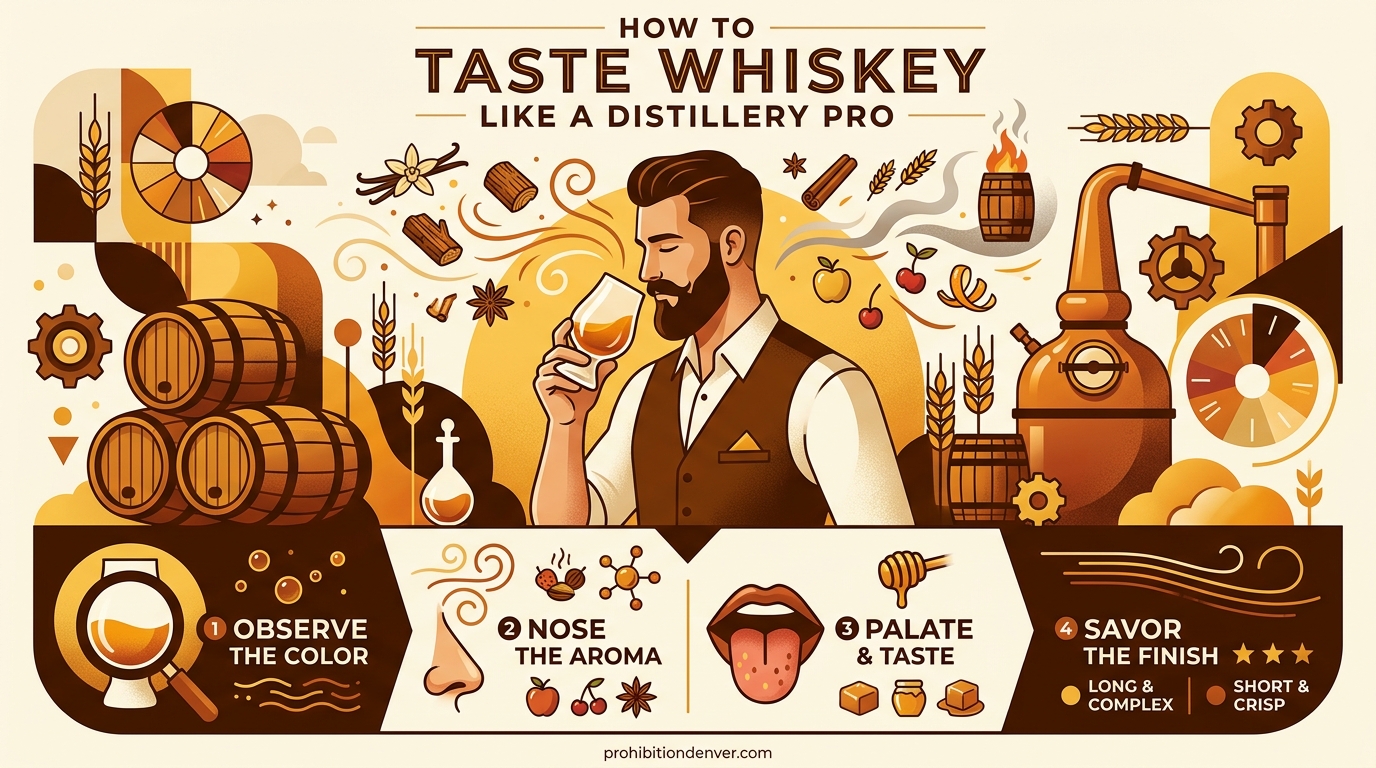
In this guide, I will walk you through the exact five-step method professionals use to evaluate whiskey. Whether you are a complete beginner or someone looking to sharpen your palate, these techniques will transform how you experience every pour. By the end, you will know how to identify flavors, understand the finish, and speak the language of whiskey with confidence.
Table of Contents
Choosing the Right Glassware
The glass you use matters more than most people realize. Professional tasters do not reach for a rocks glass or a tumbler. Those wide openings let aromas escape before you can capture them. If you want to taste whiskey like a distillery pro, you need a glass that concentrates the bouquet and directs it toward your nose.
The Glencairn glass is the industry standard for a reason. Its tulip shape funnels aromas upward while the bulbous body allows room for swirling. The narrow opening captures volatile compounds that would otherwise dissipate. I have used Glencairn glasses for years, and the difference compared to a standard rocks glass is immediately noticeable.
For higher-proof spirits, the copita glass offers another excellent option. Originally designed for sherry, its elongated shape is perfect for nosing cask-strength whiskey without getting overwhelmed by alcohol vapors. Some tasters also prefer the NEAT glass, which has a unique design that dissipates ethanol while preserving the aromatic compounds you actually want to smell.
If you only have one type of glass, get a Glencairn. They are affordable, widely available, and used by distilleries worldwide for a reason. Save the heavy-bottomed rocks glasses for cocktails or whiskey with ice. When you are tasting to appreciate the spirit itself, the right glassware is your first and most important tool.
Visual Inspection: Reading the Whiskey
Before you nose or taste, take a moment to look at what is in your glass. Professional tasters always start with visual inspection because color and viscosity tell you stories about age, cask type, and proof before a single aroma reaches your nose.
Hold your glass against a white background in natural light. The color reveals clues about maturation. Light straw suggests younger whiskey or bourbon aged in heavily charred barrels. Deep amber indicates longer aging or sherry cask influence. Ruby or mahogany tones often signal port cask finishing. While color can be manipulated with caramel coloring in some regions, American whiskey gets its hue naturally from the barrel.
Swirl the glass gently and watch the whiskey legs form. These streaks running down the inside of the glass indicate viscosity and alcohol content. Thin, fast-moving legs suggest lower proof. Thick, slow-moving legs indicate higher proof or longer aging. The term whiskey legs refers to this visual cue that helps tasters gauge what they are about to experience.
Check for clarity too. Cloudiness or sediment can indicate chill filtration was not used, which many enthusiasts prefer. However, significant cloudiness in a non-chill-filtered whiskey stored at room temperature might indicate a problem. Take thirty seconds to observe before moving on. This visual groundwork prepares your mind for what your nose and palate are about to discover.
The Art of Nosing Whiskey
Nosing is where professional tasting truly begins. Your nose can detect thousands of aromatic compounds that your tongue cannot identify on its own. Master distillers spend more time nosing than tasting because smell accounts for the majority of what we perceive as flavor.
Start with your mouth closed. Position the glass just below your nose and take short, gentle sniffs. Do not inhale deeply like you are smelling a flower. Quick, light sniffs prevent your olfactory receptors from being overwhelmed by alcohol vapor. The first thing you will likely detect is ethanol heat. Wait a moment and sniff again. The alcohol will dissipate, revealing the underlying aromas.
Now try nosing with your mouth slightly open. This technique, sometimes called retronasal breathing during nosing, allows aromatic compounds to reach olfactory receptors from a different angle. You will often pick up different notes this way. Sweet notes like vanilla and caramel tend to present themselves first. Fruit notes — apple, pear, citrus — follow. Deeper sniffs may reveal oak, spice, or smoke depending on the whiskey.
Be patient. The bouquet evolves as the whiskey opens up. First impressions matter, but returning to the glass after a minute often reveals new layers. I have been surprised by how a whiskey that initially smelled purely of vanilla would develop rich dried fruit and leather notes after sitting for just a few minutes. Professional whiskey tasting is not rushed. Give your nose time to explore.
How to Taste Whiskey Like a Distillery Pro
Now comes the moment you have been waiting for. But resist the urge to take a big gulp. Professional tasting requires small, controlled sips that maximize contact with your palate. The goal is to coat every part of your mouth so no flavor receptor is left unexplored.
Take a sip about the size of a quarter teaspoon — roughly one-fourth to one-half of a standard teaspoon. Let it rest on your tongue for three to five seconds before swallowing. This initial contact allows your taste buds to adjust to the alcohol. High-proof whiskey can initially feel hot or overwhelming. That first small sip primes your palate for what follows.
Now take your second sip, slightly larger than the first. Here is where you employ the Kentucky Chew technique. Gently move the whiskey around your mouth as if you are chewing it. Swish it across your tongue, let it touch your gums, and coat the sides of your mouth. This chewing motion ensures the liquid contacts all your taste receptors. Sweetness registers on the tip of your tongue. Sourness and acidity on the sides. Bitterness at the back.
While the whiskey is still in your mouth, breathe gently through your nose. This retronasal breathing connects your olfactory system to the flavors in your mouth, creating a complete sensory picture. You will suddenly perceive flavors you could not identify by taste alone. That vanilla note becomes more specific — maybe it is Madagascar vanilla, or maybe it is more like vanilla extract. The oak transforms from generic wood into charred oak, toasted staves, or fresh-cut lumber.
Hold the whiskey for five to ten seconds before swallowing. Notice how the flavors change while it sits in your mouth. Some whiskeys evolve dramatically, revealing new dimensions the longer you hold them. Others present themselves immediately and consistently. Both are valid experiences. The key is paying attention rather than rushing to swallow.
Analyzing the Finish
The finish is what happens after you swallow. Many beginners stop paying attention once the whiskey goes down, but professionals know that the finish often reveals the most about quality and complexity. The aftertaste can linger for seconds or minutes, evolving and changing as time passes.
Finish length falls into three categories. A short finish dissipates within seconds. A medium finish lasts fifteen to thirty seconds. A long finish persists for a minute or more. Length alone does not indicate quality — some excellent whiskeys have intentionally short finishes — but it does tell you something about concentration and complexity.
Pay attention to how the flavors evolve during the finish. Do the sweet notes fade first, leaving spice and oak behind? Does a pleasant warmth spread through your chest, or is there harshness? A quality whiskey should leave you wanting another sip, not reaching for water to wash away an unpleasant aftertaste. The best finishes reveal new flavors you did not detect during the tasting itself. I have experienced whiskeys that tasted of caramel upfront but finished with surprising dark chocolate and espresso notes.
Some tasters exhale gently through their nose after swallowing to capture any remaining aromatic compounds. This final breath can reveal subtle notes that were masked by the whiskey’s presence in your mouth. Take your time with the finish. A whiskey that disappears instantly offers less to contemplate than one that unfolds gradually.
Why Adding Water Changes Everything
Water is not cheating. Master distillers and professional tasters routinely add a few drops to high-proof whiskey. Understanding when and why to add water is part of learning to taste whiskey like a distillery pro. The science behind it is simple but profound.
Alcohol molecules bind to aromatic compounds called esters. These esters carry the flavors we love — the vanilla from oak, the fruit from fermentation, the spice from rye. At high proof, these esters are trapped by alcohol. Adding a small amount of water breaks those bonds and releases the esters. Suddenly, flavors that were hidden become apparent.
The amount matters. You do not need much. Just a few drops from a drinking straw or a small water dropper is enough. Too much water dilutes the whiskey excessively and can make it taste thin. The goal is to open up the spirit, not drown it. I usually taste a whiskey neat first, then add water and taste again. The transformation can be remarkable.
Cask strength whiskey, typically bottled at 50% ABV or higher, benefits most from water. At 60% ABV or above, the alcohol can actually numb your taste buds, making it harder to detect subtle flavors. A small amount of water brings the proof down to a more manageable level while unlocking new aromatic compounds. Even standard 80-proof whiskey can sometimes reveal new dimensions with a drop or two of water.
Pro Tips for Better Tasting Sessions
Now that you understand the core technique, here are additional strategies that will accelerate your development as a whiskey taster. These tips come from years of practice and conversations with industry professionals.
Palate Cleansing is Essential
When tasting multiple whiskeys, your palate needs resetting between samples. Unsalted crackers or plain bread work well. Some tasters prefer green apple slices, which refresh the palate without leaving strong flavors behind. Black coffee is traditional at formal tastings. Avoid salted snacks or strongly flavored foods that will interfere with your ability to taste.
Side-by-Side Comparisons Accelerate Learning
The fastest way to develop your palate is to taste two whiskeys simultaneously. Pour small amounts of different styles — maybe a bourbon and a rye, or an Irish whiskey and a Scotch — and move back and forth between them. The differences become immediately apparent when you can contrast them directly. This technique transforms abstract tasting notes into concrete understanding.
Create the Right Environment
Your environment affects your ability to taste. Avoid strong perfumes or colognes. Do not taste immediately after eating spicy or garlicky food. Room temperature is ideal — cold whiskey numbs your palate, while hot whiskey releases too much alcohol vapor. A quiet, neutral space lets you focus entirely on the sensory experience.
Manage Palate Fatigue
Your palate has limits. After three to four whiskeys, your taste buds begin to fatigue and your judgment becomes less reliable. If you are doing a formal tasting flight, limit yourself to six samples maximum. Take breaks between pours. Drink plenty of water. Remember that alcohol affects your perception, so pace yourself accordingly.
Start a Tasting Journal
Writing down your observations forces you to articulate what you are experiencing. Note the date, the whiskey, the proof, and your impressions. Over time, you will see patterns in your preferences and develop a personal vocabulary for describing whiskey. There are no wrong answers in a tasting journal. What matters is building your ability to notice and remember.
Whiskey Categories: What to Expect
Understanding the four major whiskey categories helps you know what flavors to anticipate. While every distillery produces unique expressions, these general profiles provide a useful starting point for your tasting journey.
Bourbon must be made from at least 51% corn and aged in new charred oak barrels. Expect prominent vanilla and caramel notes from the charred wood. Sweet corn flavors often appear alongside baking spices like cinnamon and nutmeg. Bourbons tend to be approachable and fruit-forward, making them excellent for beginners. Classic examples include notes of brown sugar, toasted oak, and honey.
Rye Whiskey requires at least 51% rye grain in the mash bill. Rye brings distinctive spice — think black pepper, clove, and nutmeg. You will often find herbal and grassy notes alongside the spice. Rye tends to be bolder and more assertive than bourbon, with less sweetness and more bite. The finish often lingers with peppery warmth.
Irish Whiskey is typically triple-distilled, creating an exceptionally smooth spirit. The extra distillation removes heavier compounds, resulting in a lighter body and cleaner profile. Expect floral and honeyed notes, often with fresh fruit like green apple and pear. Irish whiskey is known for being approachable and easy-drinking, making it perfect for those new to whiskey tasting.
Scotch Whisky divides into two main styles. Single malts from the Highlands and Speyside regions tend toward fruity, honeyed, and sometimes wine-influenced profiles. Islay and some Highland malts are heavily peated, delivering intense smoke, iodine, and maritime notes that can be challenging for beginners. Scotch often shows more complexity and variation than American whiskeys due to the diversity of production methods and barrel types used.
Common Mistakes to Avoid
Even with the right techniques, certain habits can undermine your tasting experience. Here are the most common errors I see beginners make, along with how to correct them.
Taking Too Large a Sip — A big gulp overwhelms your palate with alcohol before you can identify flavors. Small sips give you control and allow gradual exploration.
Rushing the Process — Professional whiskey tasting takes time. Trying to evaluate a whiskey in thirty seconds misses the evolution of flavors. Allow five to ten minutes per pour minimum.
Tasting Cold Whiskey — Chilled whiskey contracts your taste buds and suppresses volatile aromatic compounds. Room temperature is ideal for full flavor development.
Ignoring the Nose — Some people skip straight to tasting. Your nose detects far more than your tongue. Always spend time nosing before your first sip.
Getting Intimidated by Terminology — Do not worry if you cannot identify specific notes. Describing a whiskey as sweet and spicy is valid. Your vocabulary will expand with practice.
Frequently Asked Questions
How to taste whiskey like a pro?
Start by using a proper tasting glass like a Glencairn. Observe the color and legs first. Nose the whiskey with short, gentle sniffs. Take small sips and use the Kentucky Chew technique to coat your palate. Breathe through your nose while the whiskey is in your mouth. Pay attention to the finish after swallowing. Add a few drops of water to open up hidden flavors.
What is the correct way to taste whiskey?
The correct way involves five steps: visual inspection of color and viscosity, nosing with your mouth closed then slightly open, taking small controlled sips, using the Kentucky Chew technique to coat your palate, and analyzing the finish. Professional tasters always nose before tasting and often add water to high-proof whiskey.
How to start enjoying the taste of whiskey?
Begin with approachable styles like Irish whiskey or lighter bourbons. Start with lower proof expressions around 80 proof before trying cask strength. Take small sips and do not rush. Try side-by-side comparisons to understand differences. Keep a tasting journal to track what you enjoy. Add a few drops of water if the alcohol burn is too strong.
Should beginners add water to whiskey?
Yes, beginners should feel free to add water. A few drops can reduce alcohol burn and open up flavors that might be masked by high proof. This is especially helpful for cask-strength whiskey. Start by tasting neat, then add water and taste again to see the difference. There is no shame in adding water — master distillers do it regularly.
What does good whiskey taste like?
Good whiskey should taste balanced with no single element dominating unpleasantly. You should detect sweetness from the grain, complexity from the barrel aging, and a pleasant warmth without harsh burn. The finish should be satisfying and make you want another sip. Good whiskey can be sweet, spicy, smoky, or fruity depending on style, but it should never taste chemically or overly harsh.
Can whiskey help lower cholesterol?
Some studies suggest moderate whiskey consumption may have heart health benefits, potentially affecting cholesterol levels. However, these findings are not conclusive, and the health risks of alcohol consumption generally outweigh potential benefits for most people. Whiskey should be enjoyed for its flavor and craftsmanship, not consumed as a health supplement.
Final Thoughts
Learning to taste whiskey like a distillery pro opens up a world of appreciation you might never have known existed. The five-step process — visual inspection, nosing, small sips with the Kentucky Chew, retronasal breathing, and finish analysis — transforms drinking into a mindful sensory experience. These techniques are not reserved for master distillers. Anyone can learn them with practice and patience.
Remember that developing your palate takes time. Do not get discouraged if you cannot identify specific flavor notes immediately. Focus on noticing what you like and do not like. Use comparisons to understand differences. Keep tasting, keep nosing, and keep paying attention. Every glass is an opportunity to learn something new.
The best way to solidify these skills is to organize a tasting with friends. Pour three different styles side by side. Walk through the steps together. Compare notes. You will be amazed at how quickly your ability to taste whiskey like a distillery pro develops when you practice deliberately. Here is to your next pour — may it reveal flavors you never knew were there.