
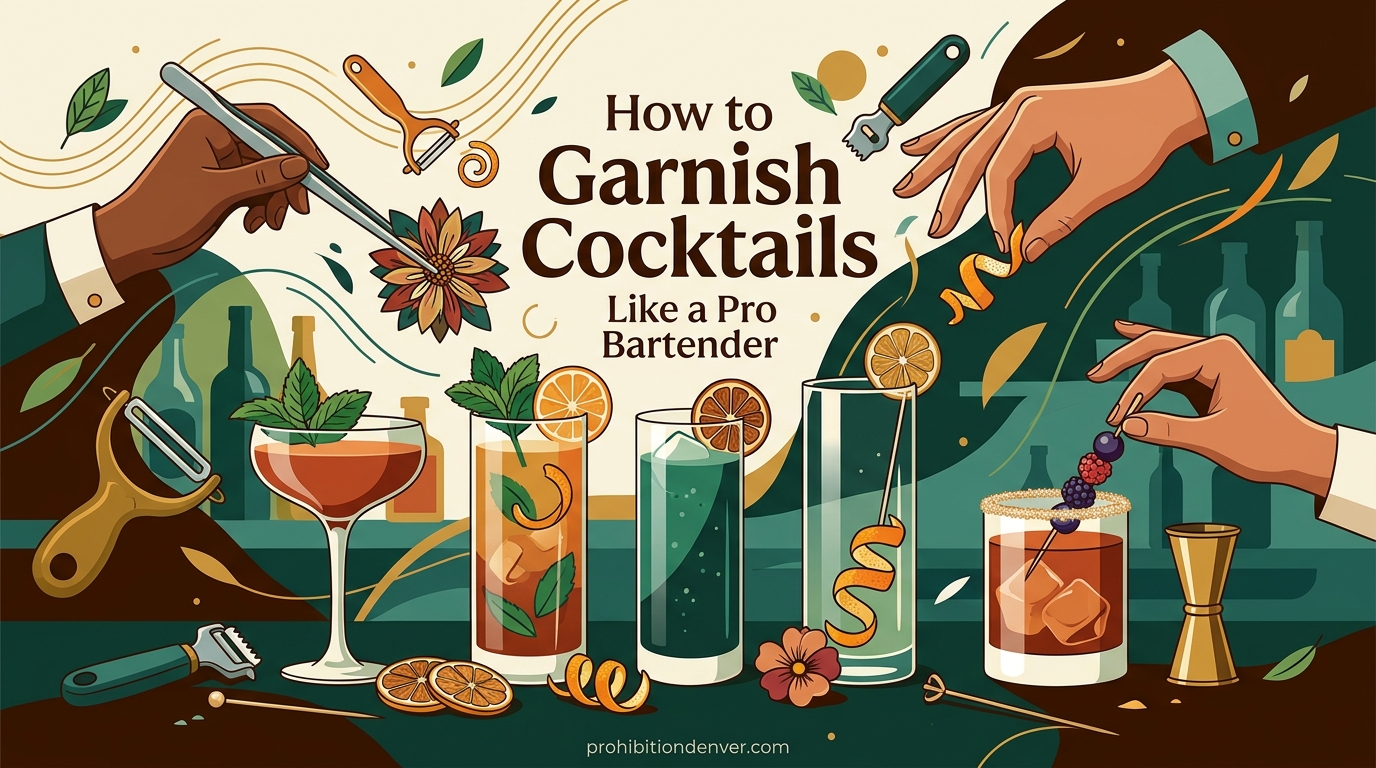
That first glimpse of a perfectly garnished cocktail sets the stage for everything that follows. The aromatic oils rising from a fresh citrus twist. The glint of salt catching the light on a margarita rim. A sprig of mint standing tall in a frosty julep. These details separate amateur pours from professional-grade drinks.
I spent three months behind the bar at a craft cocktail lounge in Denver learning these techniques from bartenders with 20+ years of experience. The truth is, professional garnishing is not about expensive tools or rare ingredients. It is about mastering a handful of fundamental techniques and understanding why each garnish matters.
In this guide, I will walk you through exactly how to garnish cocktails like a pro bartender. You will learn the specific cuts, the timing, and the small details that elevate your home bar game to professional standards.
Table of Contents
Why Garnishes Matter More Than You Think
Professional bartenders follow three rules when choosing a garnish: aroma first, visual appeal second, complementary flavor third. The scent hits your nose before the liquid touches your lips. That anticipation shapes your entire perception of the drink.
A study from the Flavor Research and Education Center confirms what working bartenders already know. Aromatic garnishes significantly enhance perceived flavor intensity. The visual presentation affects expectations. The actual taste comes last in the hierarchy of sensory experience.
A poorly executed garnish does more harm than good. A wilted mint leaf signals indifference. A thick, pithy citrus twist introduces bitterness. An uneven salt rim looks careless. Learning proper technique ensures your garnishes enhance rather than detract.
Essential Tools Every Home Bartender Needs
You do not need a professional bar kit to create stunning garnishes. Five quality tools handle 95% of cocktail garnishing needs. Invest in these basics before expanding your collection.
The Sharp Paring Knife
This is your workhorse tool. A 3 to 4-inch blade with a comfortable grip allows precise control for detailed cuts. Dull knives slip and crush ingredients rather than slicing cleanly. Professional bartenders hone their knives before every shift.
Look for a high-carbon stainless steel blade that holds an edge. Avoid serrated edges for garnish work. They tear rather than slice, damaging delicate herbs and citrus membranes.
The Channel Knife or Zester
This specialized tool creates those beautiful long citrus twists you see in upscale bars. The notched blade removes just the colored zest while leaving the bitter white pith behind. A good channel knife costs between $12 and $25 and lasts for years.
The Y-Shaped Vegetable Peeler
For clean, wide strips of citrus peel, nothing beats a sharp Y-peeler. The design gives you better control and visibility than straight peelers. Use it for making twists, removing pith from wheels, and creating vegetable ribbons.
Cocktail Picks and Wooden Skewers
Metal cocktail picks add elegance to speared garnishes. Wooden skewers work for larger fruit arrangements. Keep both on hand. Odd numbers look best. One olive is lonely. Three creates visual balance. Five starts looking crowded on standard glassware.
Dedicated Cutting Board
Cross-contamination affects flavor. A separate board for garnishes prevents your mint from tasting like onions or garlic. Choose a small board you can move easily. Non-slip feet prevent accidents during rushed preparation.
How to Garnish Cocktails Like a Pro Bartender: Citrus Twists
Citrus twists are the most versatile garnish in bartending. Master this technique first. Everything else builds from these fundamentals.
The Basic Citrus Twist
Start with a firm, fresh lemon, lime, or orange. Room temperature citrus peels more easily than cold, but cold citrus releases more oils when expressed. Many professionals keep citrus refrigerated, then warm it in their hands for 30 seconds before peeling.
Hold the fruit in your non-dominant hand. Position your peeler or paring knife at the top. Apply gentle pressure and rotate the fruit as you cut downward. Aim for a continuous strip about 1 inch wide. Stop before reaching the bottom white pith.
The goal is removing only the colored zest. The white pith beneath tastes bitter. Experienced bartenders can feel the difference through the blade. Practice on several fruits until you consistently get clean strips.
Expressing Citrus Oils
This technique transforms a simple twist into an aromatic experience. Hold the peel colored-side down over your finished cocktail. Pinch the peel between thumb and forefinger. Twist gently while pulling the ends apart.
You will see a fine mist of citrus oils spray across the drink surface. This is the expression. The oils carry concentrated flavor and fragrance. After expressing, rub the peel around the rim to transfer those oils to the glass edge. Then drop the twist into the drink.
Practice the snap motion until it becomes automatic. The best bartenders express oils with a distinctive snap that customers notice. That auditory cue becomes part of the experience.
The Fanned Twist
Create visual drama with a fanned citrus twist. Cut a standard twist about 6 inches long. Hold one end between thumb and forefinger. Use your other hand to twist the peel into a spiral. Maintain tension.
Release slowly while maintaining the spiral shape. The natural oils help it hold the curl. Drape the fanned twist over the glass rim or float it on the drink surface. This works beautifully on Old Fashioneds and Manhattans.
The Citrus Rosette
This advanced technique impresses guests and demonstrates true skill. Cut a twist approximately 8 inches long and 1 inch wide. Roll it tightly from one end to the other, like a cinnamon roll. The oils will help it hold shape.
Place the rosette on a pick or allow it to float. The spiral layers create dimension and visual interest. This garnish takes practice but becomes quick once muscle memory develops.
Citrus Wedges, Wheels, and Slices
Different cocktails call for different citrus presentations. Understanding when to use each cut separates amateur from professional presentation.
The Notched Wedge
Standard wedges fall into drinks or slide off rims. The notch technique solves this problem. Cut your lemon or lime in half lengthwise. Place the flat side down. Cut each half into three or four equal wedges.
Now make a single cut from the center of each wedge toward the peel side, stopping halfway through. This creates a slit. The wedge now grips the glass rim securely. The flesh faces outward for visual appeal and easy squeezing.
Professional bartenders prep dozens of these before service. Store them in a covered container with a damp paper towel to prevent drying.
Floating Citrus Wheels
Wheels add color and function as barriers that slow dilution. Use a sharp knife to cut crosswise slices about 1/4 inch thick. Remove seeds with the tip of your knife. Cut a single notch from the edge to the center.
This notch allows the wheel to sit on the rim or slide onto a stirrer. For floating wheels, skip the notch and simply rest the slice on the drink surface. Thicker wheels sink slower. Thinner wheels look more elegant but disappear quickly.
The Crescent Moon Cut
This cut creates an elegant half-moon shape that drapes over glass rims beautifully. Cut a standard wheel, then cut it in half. Remove the central pith and any seeds. The result is a clean crescent that hugs the curve of the glass.
Remove the white pith completely for this garnish. The pith becomes especially noticeable in crescent cuts. Use the edge of your knife to scrape away any remaining white membrane.
Fresh Herb Garnishes
Herbs add fragrance, color, and subtle flavor to cocktails. The technique matters as much as the herb selection.
The Mint Bouquet
Mint juleps and mojitos demand proper mint presentation. Select sprigs with fresh, unwilted leaves. Look for stems with multiple leaf clusters. Strip the bottom leaves to expose 2 inches of bare stem. This creates a clean handle.
Place the mint in your palm. Gently slap the leaves against your other hand. This bruising releases aromatic oils. Do not over-bruise. You want fragrance, not blackened leaves. Insert the stem into the drink so the bouquet stands tall.
The slap should produce an audible sound. That sound signals freshness to experienced drinkers. The bouquet should stand at a slight angle, not perfectly upright. This looks more natural and inviting.
When to Bruise, When to Leave Whole
Bruising releases oils but damages appearance. Use bruising when aroma is the priority and the herb sits in the drink. Mojitos and juleps benefit from bruised mint because the leaves mingle with the liquid.
Leave herbs whole when they rest on the rim or serve as aromatic garnishes only. A rosemary sprig draped over a winter cocktail looks elegant untouched. The heat from the drink releases its oils naturally.
Basil bruises easily and turns black. Handle it gently. thyme and rosemary tolerate more handling. Learn each herb’s characteristics through practice.
Herb Selection Guide
Match herbs to cocktail profiles. Mint complements rum and citrus. Basil pairs beautifully with gin and strawberry. Rosemary works with gin, bourbon, and grapefruit. Thyme matches lemon and honey.
Experiment with tarragon for anise-forward drinks. Sage brings earthiness to whiskey cocktails. Lavender adds floral notes to gin and champagne. Edible flowers like pansies and violas work for special occasions.
Salt and Sugar Rim Techniques
Rimming transforms glassware into part of the garnish. Done correctly, it adds texture and flavor. Done poorly, it looks amateur and feels unpleasant on the lips.
The Classic Salt Rim
Use kosher salt or flaky sea salt. Avoid iodized table salt. It tastes too sharp and dissolves unevenly. Pour salt onto a small plate in a thin layer. The layer should be about 1/4 inch deep.
Run a citrus wedge around the outer rim of your glass. Moisten about 1/4 inch of glass surface. Do not wet the inside. Salt on the interior affects drink flavor and creates grit in every sip.
Hold the glass upside down at a 45-degree angle. Touch the moistened rim to the salt. Rotate slowly while applying gentle pressure. Lift and inspect. Fill gaps by repeating the process. Tap gently to remove excess.
The Partial Rim
Full rims overwhelm some drinkers. The partial rim offers choice. Moisten only half the glass circumference. Apply salt to that section. Some bartenders prefer the partial rim aesthetically. It creates visual asymmetry.
Mark the rimmed side with a small garnish. A lime wedge on the salted side signals where to sip. This thoughtful detail impresses guests.
Flavored Rim Variations
Experiment with smoked salt for mezcal cocktails. Try celery salt for savory drinks like Bloody Marys. Chili-lime salt adds heat to margaritas. Match the rim flavor to your cocktail profile.
Sugar rims work for dessert cocktails and lemon drops. Use superfine sugar for better adhesion. Add cinnamon, cocoa powder, or citrus zest to sugar for flavored variations. Rim only the outer edge just as with salt.
Advanced Garnish Techniques
Once you master basics, these advanced techniques add showmanship to your repertoire.
Fruit Fans
Apple and pear fans create stunning visual impact. Cut thin slices using a mandoline or sharp knife. Slices should be nearly transparent. Arrange five to seven slices in overlapping layers on a cutting board.
Press gently to fan them out. Slide a pick through the base to secure. The fan should spread about 3 inches wide. Place it across the rim or lean it against the glass interior. These work beautifully on autumn and winter cocktails.
Vegetable Ribbons
Cucumber ribbons add elegance to gin cocktails and Pimm’s Cups. Use your Y-peeler to create long, continuous strips. Apply steady pressure for uniform thickness. One cucumber yields several ribbons.
Wrap ribbons around the inside of tall glasses. They create visual interest while adding subtle flavor. Alternatively, curl them into the drink like a citrus twist. The high water content keeps them crisp for hours.
Carrot ribbons work for savory cocktails. Beet ribbons add dramatic color. Experiment with ribboned vegetables to expand your garnish vocabulary.
Flaming Cinnamon
This technique creates aromatic smoke and visual drama. Hold a cinnamon stick with metal tongs. Light one end with a lighter or match. Let it flame for 2 seconds, then blow it out.
Place the smoking stick across the glass rim. The smoke infuses the drink. This works beautifully on whiskey cocktails, hot toddies, and winter warmers. Always extinguish fully before serving. Safety comes before showmanship.
Dehydrated Citrus Wheels
Dehydrated garnishes offer shelf stability and intense flavor concentration. Slice citrus into thin wheels. Arrange on a baking sheet lined with parchment. Dry at 170 degrees Fahrenheit for 4 to 6 hours.
The wheels should be brittle but not browned. Store in an airtight container with silica packets. They last for months. Float them on cocktails as edible art pieces. They also work beautifully as rim decorations.
Pro Tips from Working Bartenders
These insights come from bartenders who garnish hundreds of drinks per shift. They represent accumulated wisdom from years of professional service.
Pre-Service Preparation
Prep everything before your first guest arrives. Professional bartenders spend 30 to 45 minutes on garnish preparation. Wash and dry all produce. Cut citrus into wedges, wheels, and twists. Store each type separately.
Damp paper towels keep herbs fresh. Covered containers prevent citrus from drying. Arrange everything within arm’s reach. During service, you should grab garnishes without looking.
The Odd Number Rule
Visual balance favors odd numbers. One olive looks insufficient. Two looks accidental. Three looks intentional and balanced. Five works for larger presentations. Seven becomes crowded.
This applies to herb sprigs, fruit pieces, and decorative elements. Count your garnishes before presenting the drink.
Keeping Garnishes Fresh
Wilted garnishes ruin presentation. Store herbs in water like flowers. Change the water daily. Keep citrus refrigerated but bring to room temperature before cutting. Cut only what you will use within two hours.
During service, work from backup containers. Replenish from refrigerated storage as needed. Never let garnishes sit in direct sunlight or near heat sources.
Common Mistakes to Avoid
Thick citrus pith introduces bitterness. Check your cuts and trim excess white membrane. Soggy garnishes result from premature preparation. Cut herbs just before service. Wet glass rims dissolve salt and sugar prematurely. Rim glasses immediately before serving.
Inconsistent sizing looks unprofessional. Use guides or practice until your cuts become uniform. Over-garnishing overwhelms the drink. One perfect garnish beats three mediocre ones.
Troubleshooting Common Garnish Problems
Soggy or Wilted Garnishes
If your mint collapses within minutes, you are bruising too aggressively. Handle herbs gently. Store citrus in cold water if cutting far in advance. Dry thoroughly before using. Excess moisture accelerates wilting.
Uneven Salt Rims
Patchy rims usually mean inconsistent moisture. Apply citrus juice evenly around the rim. Do not rush this step. If salt clumps in sections, your salt layer is too thick. Use a thin, even layer on your plate.
Citrus That Will Not Peel Cleanly
Old citrus has dried membranes that tear. Fresh citrus peels cleanly. The pith separates easily from the zest. If your peeler keeps grabbing white pith, sharpen the blade. Dull blades skip and catch.
Quick Fixes During Service
Keep backup garnishes in a refrigerated container. When your primary supplies wilt, switch immediately. A small spray bottle of water revives slightly wilted herbs. Use it sparingly. Wet herbs look worse than slightly dry ones.
If you run out of a specific garnish, substitute intelligently. Lemon works for lime in most cases. Rosemary substitutes for thyme. Explain substitutions to guests when necessary. Honesty beats pretending everything is perfect.
Frequently Asked Questions
What is the proper way to cut a citrus twist for cocktails?
Use a sharp paring knife or channel knife to remove a continuous strip of colored zest, avoiding the white pith beneath. Hold the fruit in one hand and rotate it while cutting downward with gentle pressure. Aim for a strip about 1 inch wide and 6 to 8 inches long. Practice on several fruits until you can consistently get clean strips without bitter pith.
How do you express citrus oils over a cocktail?
Hold the citrus peel colored-side down over the drink. Pinch the peel between your thumb and forefinger while gently twisting the ends in opposite directions. You will see a fine mist of oils spray across the surface. This technique releases concentrated aroma and flavor. After expressing, rub the peel around the rim and drop it into the drink.
What tools do you need for cocktail garnishes?
The five essential tools are: a sharp paring knife for detailed cuts, a channel knife or zester for citrus twists, a Y-shaped vegetable peeler for clean strips, cocktail picks for skewered garnishes, and a dedicated cutting board. These handle 95% of professional garnishing needs. Quality matters more than quantity.
How do you keep garnishes fresh during service?
Store herbs in water like fresh flowers and change the water daily. Keep citrus refrigerated but bring to room temperature before cutting. Prep only what you will use within two hours. Work from backup containers during service and replenish from refrigerated storage as needed. Avoid direct sunlight and heat sources.
How many garnishes should you use per drink?
Follow the odd number rule for visual balance. One garnish often looks insufficient. Three garnishes create intentional, balanced presentation. Five works for larger presentations. Avoid even numbers which look accidental. Remember that one perfect garnish beats three mediocre ones. Quality always exceeds quantity.
Can you prep garnishes ahead of time?
Yes, professional bartenders prep garnishes 30 to 45 minutes before service. Cut citrus into wedges, wheels, and twists. Store each type separately in covered containers. Keep herbs in water. However, cut delicate herbs just before serving as they wilt quickly. Properly stored citrus lasts several hours. Dehydrated garnishes can be made days or weeks in advance.
Conclusion
Learning how to garnish cocktails like a pro bartender takes practice, not special equipment. Start with citrus twists. Master expressing oils. Build confidence with basic cuts before attempting advanced techniques like flaming cinnamon or fruit fans.
The professionals I trained under emphasized consistency over complexity. A simple lemon twist executed perfectly every time impresses more than elaborate garnishes that fail half the time. Focus on fundamentals. Speed and flair develop naturally with repetition.
Your home bar deserves professional presentation. These techniques elevate ordinary drinks into memorable experiences. Guests notice thoughtful details. The aromatic oils from a properly expressed twist. The balanced visual of three olives on a pick. The confidence of a clean salt rim.
Practice these techniques the next time you mix drinks. Your cocktails will thank you. Your guests will notice. And you will understand why professional bartenders consider garnishing an essential craft rather than an afterthought.