
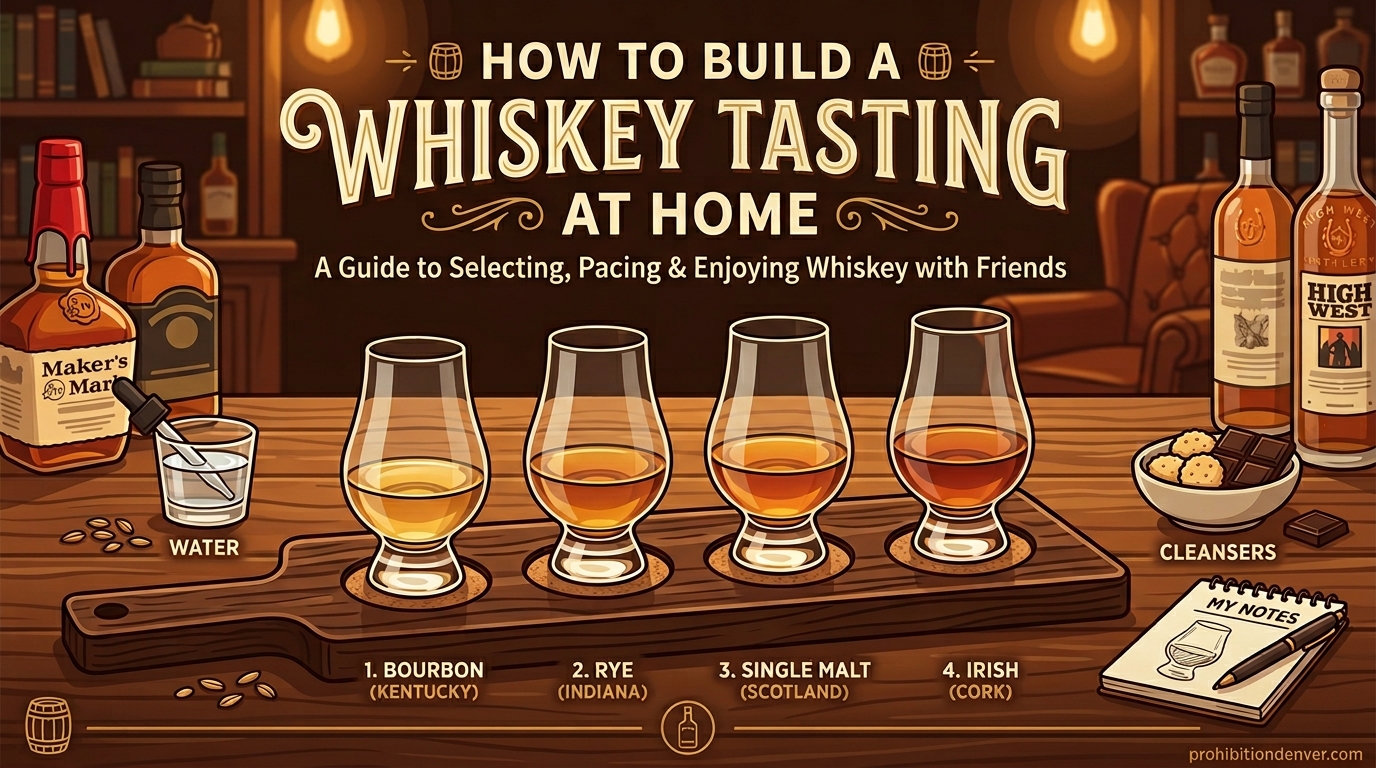
There is something undeniably captivating about gathering a small group of friends around a carefully curated selection of whiskeys, each pourTell story through its color, aroma, and flavor. Building a whiskey tasting flight at home is one of the most rewarding ways to explore the vast world of whiskey without ever leaving your living room. Whether you are a newcomer eager to develop your palate or a seasoned enthusiast looking to deepen your appreciation, this guide will walk you through every step of creating an unforgettable home whiskey tasting experience.
In this comprehensive guide, you will learn how to select the right whiskies, choose appropriate glassware, master the art of tasting, construct your own flight board, and host a gathering that your guests will talk about for months to come.
Table of Contents
What Is a Whiskey Tasting Flight?
A whiskey tasting flight is a curated selection of three to five different whiskeys served side-by-side in small portions, typically between half an ounce and one ounce each. The term “flight” comes from the airline industry, where passengers once received small samples of multiple wines to compare and choose their in-flight preferences. This format was adopted by wine professionals and eventually crossed over into the spirits world, where it has become the gold standard for comparative tasting.
Unlike drinking a single glass of whiskey on the rocks, a flight invites you into a structured conversation between spirits. Each whiskey is evaluated on its own terms, but the real magic happens when you compare them directly. You begin to notice how a Speyside single malt differs from an Islay peated expression, how a wheated bourbon diverges from a traditional rye, and how aging in sherry casks produces dramatically different results from aging in charred American oak.
The beauty of building a whiskey tasting flight at home lies in your complete creative control. You decide which expressions to feature, what theme or progression to follow, and how to present the experience. There are no rules except those you choose to follow, and the only goal is to enjoy and learn from each pour.
Selecting Your Whiskies: From Light to Bold
The foundation of any great flight is thoughtful whiskey selection. The number of whiskeys you include and the way you arrange them will define the entire tasting experience, guiding your palate through a journey that should feel natural and progression rather than chaotic or overwhelming.
How Many Whiskies Should You Include?
Most experts recommend including three to five whiskeys in a single tasting flight. Three whiskies work well for focused, detailed exploration and are ideal for beginners who want to concentrate on understanding fundamental differences. Four to five expressions allow for more complex progressions and are better suited for experienced tasters or when you want to showcase a specific theme such as regional diversity or cask influence.
Avoid the temptation to include too many expressions in a single flight. Tasting more than five whiskeys in one session typically leads to palate fatigue, where your ability to discern subtle flavors diminishes significantly after the fifth pour. Quality always trumps quantity in flight tastings, and your guests will appreciate a thoughtful selection over an exhausting marathon.
Building a Flavor Progression
The cardinal rule of flight building is to arrange your whiskeys from light to bold, also sometimes referred to as light to robust or low to high. This means starting with lower alcohol by volume (ABV) expressions and lighter-bodied whiskeys, then gradually progressing toward higher ABV and more full-bodied, complex pours. This progression protects your palate because starting with a bold, high-proof whiskey will overwhelm your taste buds and make it nearly impossible to appreciate the subtleties of lighter expressions afterward.
When selecting your lineup, consider incorporating diversity across several dimensions. Regional diversity helps illustrate how geography and distillation traditions shape flavor. A flight that includes a Lowland Scotch, an Irish pot still whiskey, a Kentucky bourbon, and a Japanese whisky gives you a wonderful cross-section of global whiskey-making philosophies. You might also explore a single region’s expressions, comparing how different distilleries or mash bills approach the same terrior.
Cask influence is another powerful lens for flight building. Consider including whiskies that showcase different wood influences: an expression aged exclusively in ex-bourbon casks, one finished in sherry butts, another in port pipes, and perhaps a wine-finished whiskey. This approach highlights how wood and previous contents shape the final liquid in ways that are often surprising to newcomers.
For beginners working with a limited budget, do not feel obligated to purchase expensive bottles. Many quality introductory expressions cost between twenty and forty dollars and offer excellent learning opportunities. Airline sampler packs, available at specialty liquor stores, also provide an affordable way to explore multiple expressions without committing to full bottles.
Essential Glassware for Whiskey Tasting
While you can technically taste whiskey from any glass, using the right glassware dramatically enhances the experience by concentrating aromas and allowing for proper evaluation. The shape of a glass influences how spirits volatilize and reach your nose, which is where approximately seventy to seventy-five percent of flavor perception actually occurs.
Best Glassware Options
The Glencairn glass is the most widely recognized and recommended glass for whiskey tasting. Originally designed for whisky appreciation in the late nineteenth century and refined for modern use, this tulip-shaped glass features a wide base that allows you to appreciate the color and legs of the whiskey while the tapered rim concentrates the bouquet for easy nosing. Its shape also makes it comfortable to hold and swirl without risking spillage.
The NEAT glass (Necessarily Evolved Advanced Tasting) was developed specifically to address the challenge of tasting high-proof spirits. Its unique parabolic shape allows you to nose spirits at approximately forty-five percent ABV without the overwhelming burn that typically accompanies smelling spirits at higher alcohol concentrations. This makes it particularly valuable when comparing cask strength expressions in your flight.
Tulip-shaped copita glasses, originally used for sherry and brandy, work wonderfully for whiskey tasting as well. Their design shares many similarities with the Glencairn, featuring a bulbous bottom and narrow top that trap aromas effectively. Many serious whisky collectors prefer copitas for their elegant appearance and professional-grade functionality.
For casual home tastings, any clean, clear glass with a slightly narrowed opening will suffice. The key requirements are a wide enough base to observe the whiskey’s appearance and a rim that is not so wide that aromas escape immediately. Avoid using heavily chilled glasses, as cold temperatures suppress aroma and flavor perception.
Why Glass Shape Matters
When you swirl whiskey in a glass, volatile aromatic compounds rise and collect beneath the rim. A properly shaped glass traps these compounds, allowing you to experience the full range of the whiskey’s bouquet with each inhalation. This is why nosing is considered the most important step in tasting, and why glassware investment pays dividends in the quality of your overall experience.
The Art of Tasting: Nose, Palate, and Finish
True whiskey appreciation requires engaging all your senses and approaching each pour methodically. The standard tasting framework divides the experience into four stages: appearance, nose, palate, and finish. Mastering this process transforms passive drinking into active exploration.
Step 1: Appearance
Before you even bring the glass to your nose, take a moment to evaluate the whiskey visually. Hold the glass against a white background and observe the color. Whiskey ranges from pale straw gold to deep amber brown, with color offering clues about aging duration and cask type. Longer maturation in oak typically produces deeper hues, while spirits aged in ex-sherry casks often display reddish or copper tones.
Next, swirl the glass gently and observe the legs or tears that form on the interior. Thicker, slower-moving legs generally indicate a higher sugar content or older age, while quick-forming thin legs suggest a lighter body or younger spirit. While these observations are not definitive, they add another layer of information to your tasting notes.
Step 2: The Nose
The nose is where the real journey begins. With the glass stationary, position your nose just inside the rim and take a gentle, slow inhalation. At first, you may detect only alcohol, which is perfectly normal. With patience, the underlying aromatic complexity reveals itself in waves. Experienced tasters describe discovering notes in sequence: an initial impression, followed by deeper notes that emerge only after the alcohol has somewhat opened the spirit.
Try to identify specific aromas without forcing conclusions. Common whiskey aromatics include vanilla, caramel, honey, orchard fruits, citrus, dried fruits, nuts, chocolate, coffee, leather, tobacco, spices like cinnamon and clove, and floral notes. With Islay and other heavily peated Scotch whiskies, you might encounter maritime elements like sea salt, brine, iodine, and distinctive smoky aromas.
When nosing multiple whiskeys in a flight, approach them in the same order you will taste them. The nose sets expectations for the palate and prepares your sensory system for what is to come. Some tasters find it helpful to take a small sip, roll it across their tongue, then nose again to experience how the palate influences what you smell.
Step 3: The Palate
Now take your first deliberate sip. Allow the whiskey to coat your entire mouth, rolling it across your tongue and letting it contact all your taste receptors. The tongue detects sweet, sour, salty, bitter, and umami sensations, and whiskey engages all of these to varying degrees depending on its composition.
As the whiskey sits in your mouth, notice its texture or mouthfeel. Is it light and delicate, coating and viscous, or somewhere in between? The term “legs” is sometimes used to describe this coating quality on the palate, which relates to the spirit’s glycerol content and age. Younger whiskeys often feel thinner, while older expressions develop a richer, almost oily texture.
Identify the primary flavors you experience. Bourbon frequently presents notes of vanilla, caramel, corn sweetness, and oak spices. Rye whiskeys tend toward peppery spice, dill, and rye grain character. Scotch whisky varies dramatically by region, from Speyside’s fruity elegance to Islay’s smoky intensity. Irish whiskey often displays lighter, floral qualities with notes of green apple and honey. Japanese whisky frequently emphasizes subtlety, precision, and sometimes smoky undertones.
Do not rush the palate stage. Let the whiskey breathe and evolve in your mouth before swallowing. You may notice new flavors emerging as the spirit oxidizes slightly and your palate adjusts to the alcohol.
Step 4: The Finish
The finish refers to the sensations that remain after you swallow the whiskey. This stage is often what separates everyday whiskeys from exceptional ones, as the best expressions leave a long, complex, and evolving finish that lingers pleasantly for many seconds.
Pay attention to the duration of the finish. Does the flavor disappear quickly, or does it persist? What flavors emerge as the initial impact fades? A quality whiskey often transitions through several flavor phases during its finish, moving from initial impressions to secondary and tertiary notes that reveal themselves only over time.
Common finish descriptors include drying, warming, spicy, sweet, smoky, or clean. Some whiskeys leave a mineral or maritime quality on the finish, particularly those from coastal distilleries. Others present a lingering sweetness that fades gracefully into vanilla and wood notes.
Taking notes during your flight helps you remember and articulate what you experienced. Jot down brief observations about each whiskey’s appearance, nose, palate, and finish. Over time, these notes build a personal reference library that guides future purchasing decisions and deepens your overall appreciation.
Palate Cleansers and Water
Maintaining a clean palate throughout your flight is essential for accurate comparative tasting. Without proper palate management, flavors from one whiskey blend into the next, obscuring the distinct characteristics you are trying to identify and appreciate.
Water is your most important tool. Between each whiskey, rinse your glass thoroughly and take a small sip of plain water to reset your palate. Many experienced tasters also add a drop or two of water to their whiskey, which opens up the spirit and releases additional aromas by reducing the alcohol’s viscosity. This technique, sometimes called “opening the whiskey,” is particularly useful for cask strength expressions that might otherwise overwhelm the palate.
Plain oatcakes are the traditional palate cleanser in whisky tasting, and for good reason. Their neutral flavor provides a brief textural reset without introducing competing aromas or tastes. Plain water crackers serve the same purpose equally well. Avoid flavored crackers, cheese, or other foods between individual tastings, as these will contaminate your palate and interfere with subsequent evaluations.
If you plan to enjoy food pairings with your flight, save them for after you have completed your comparative tasting. Sampling strongly flavored foods before or during the flight will obscure the subtle nuances that distinguish each whiskey and undermine the purpose of structured tasting.
Pacing yourself matters enormously. Take your time with each pour and resist the urge to rush through the flight. Palate fatigue sets in when you overexert your taste receptors, leading to diminished sensitivity that makes later whiskeys in the flight taste increasingly similar. If you find yourself struggling to distinguish between expressions, take a longer break, hydrate, and consider pausing the tasting altogether.
Food Pairings for Whiskey Tasting
While food pairings are best experienced after your flight tasting is complete, knowing which combinations work well enhances any whiskey gathering and opens up new dimensions of enjoyment. The key principle is that certain foods can complement, contrast, or even transform the flavors in whiskey.
Classic Pairings
Dark chocolate is perhaps the most celebrated whiskey pairing. The bitterness of high-quality chocolate balances the sweetness of many whiskeys, while both share complex flavor compounds that amplify each other. Dark chocolate with seventy percent cacao or higher works best with bourbon and sherry-finished Scotch, creating a luxurious end-of-evening combination.
Cheese offers endless pairing possibilities depending on the type you choose. Aged cheddar complements the vanilla and oak notes in bourbon beautifully. Soft, creamy cheeses like brie provide textural contrast against the whiskey’s heat. Blue cheese, with its intense and pungent character, stands up well to peated Scotch and creates a memorably bold combination for adventurous palates.
Nuts, particularly roasted almonds and walnuts, offer textural satisfaction and mild flavors that do not overpower whiskey. They provide a satisfying snack during and after tasting without interfering with flavor perception. Marcona almonds, with their buttery character, are especially effective with lighter Irish whiskey or Japanese whisky.
What to Avoid
Strongly flavored foods should be avoided during active tasting. Citrus fruits, heavily spiced dishes, coffee, and anything with mint or menthol will dominate your palate and prevent you from experiencing the whiskey accurately. If you are serving a meal before or alongside your flight, consider scheduling the tasting as a separate event after the dishes have been cleared and palates reset.
Building a DIY Flight Board at Home
A well-presented flight board elevates your tasting from casual drinking to a refined sensory experience. Commercial flight boards are available for purchase, but building your own is surprisingly simple and allows for customization to match your personal style and existing home decor.
Materials Needed
For a basic wooden flight board, you will need a piece of hardwood measuring approximately eighteen inches long, ten inches wide, and three-quarters of an inch thick. Walnut, cherry, and maple are excellent choices for their durability and attractive grain patterns. You will also need wood glue, fine-grit sandpaper, food-safe finish or mineral oil, and small wooden dowels or cylinders to create the individual glass recesses.
The glass holders can be created using standard wooden dowels cut to length and rounded at the top, or you can use brass or stainless steel bottle accessories designed for this purpose. Some builders prefer to create simple circular indentations directly into the wood using a Forstner bit, which holds the glasses more securely without requiring additional hardware.
Simple Build Instructions
Begin by sanding the board smooth, starting with one-twenty grit sandpaper and progressing to two-twenty grit for a silky-smooth surface. If you are creating recessed holes for your glasses, mark their positions carefully, ensuring even spacing and adequate distance from the board’s edges. Drill the holes to a depth of approximately one-quarter inch using a drill press for accuracy, or use a hand drill with careful guidance.
Apply a food-safe finish to protect the wood and make cleanup easier. Tung oil, linseed oil, or specialized food-safe wood finishes work well and enhance the natural beauty of the grain. Avoid polyurethane or other film-forming finishes that might chip or flake over time.
If you prefer not to build from scratch, repurpose items you already own. A charcuterie board, slate cheese board, or even a simple wooden cutting board can serve as an effective flight presentation surface. Place small ramekins or shallow dishes at one end for water and palate cleansers, and arrange your glasses in a row for easy access and visual appeal.
Labeling is a thoughtful addition that helps guests identify which whiskey is which throughout the tasting. Small card holders or adhesive labels work well, or you can create elegant hand-lettered tags that match the evening’s theme. Some enthusiasts print tasting notes sheets that accompany each glass position, creating a more educational experience.
Tips for Hosting a Whiskey Tasting Party
Hosting a whiskey tasting party at home combines the joy of sharing excellent spirits with the pleasure of good company. With thoughtful preparation, you can create an event that feels both sophisticated and welcoming, ensuring guests feel comfortable asking questions and exploring their preferences.
Setting the Mood
Atmosphere matters enormously for whiskey appreciation. Dim the overhead lighting and rely on candles or lamp light, which creates warmth and allows guests to better observe the whiskey’s color. Avoid strongly scented candles, incense, or air fresheners, as competing aromas interfere with accurate nosing and tasting.
Background music should be subtle and unobtrusive. Many hosts choose jazz, acoustic, or classical music that establishes a refined ambiance without demanding attention. The goal is to create a relaxed environment where conversation flows naturally but does not overwhelm the sensory experience.
Temperature also plays a role. A room that is too warm will accelerate the pace of drinking and contribute to premature fatigue, while a cool room is more comfortable for extended sessions. Most hosts find that standard room temperature, around sixty-eight to seventy-two degrees Fahrenheit, works well for whiskey tasting.
Pacing Your Guests
Structure your event with clear phases. Begin with a brief introduction explaining the flight theme, the whiskeys you have selected, and the tasting method you will follow. This context enriches the experience and gives guests something to think about as they work through each pour.
Allow approximately twenty to thirty minutes per whiskey, depending on group size and engagement level. This pacing gives everyone adequate time to evaluate each expression, discuss observations with neighbors, and take notes if they wish. Rushing through the flight defeats the purpose of comparative tasting and often leads to palate overload.
Encourage questions and discussion throughout the evening. Whiskey tasting is inherently social, and guests often discover new insights by sharing their impressions. Some of the most valuable learning happens when someone detects a flavor that others missed, prompting a closer look at that particular expression.
Consider incorporating a blind tasting element, where one or more whiskeys are presented without identification. Blind tastings remove preconceptions based on price, reputation, or brand, allowing participants to evaluate spirits purely on their sensory merits. This approach can be eye-opening and often reveals that lesser-known expressions rival more prestigious bottles in blind comparison.
Finally, have water and non-alcoholic beverages available throughout the evening. Not every guest will want to complete every pour, and some may prefer to nurse a single glass while engaging with the discussion. Hydration is essential for both safety and maintaining tasting acuity over the course of an extended event.
Frequently Asked Questions
How many whiskeys should be in a tasting flight?
A standard tasting flight contains three to five whiskeys. Starting with three allows beginners to focus on identifying flavor differences without experiencing palate fatigue. More experienced tasters may enjoy four or five expressions, but exceeding this typically results in diminished sensitivity and reduced appreciation of individual pours.
What is the correct order to taste whiskies in a flight?
Always taste from light to bold, meaning you should begin with lower ABV and lighter-bodied expressions, then progress to higher proof and more complex, full-bodied whiskeys. This progression protects your palate from being overwhelmed and ensures each whiskey can be appreciated on its own merits.
Do I need special glassware for whiskey tasting?
While not strictly required, proper glassware significantly enhances the experience. A Glencairn glass is the most popular choice for concentrating aromas and is widely available at reasonable prices. The NEAT glass is excellent for high-proof expressions. Any clean glass with a slightly narrowed opening will work in a pinch, but investing in proper tasting glassware elevates the entire experience.
How do I cleanse my palate between tastings?
Use plain water to rinse your glass between whiskeys and to reset your palate. Plain oatcakes or water crackers serve as neutral palate cleansers that provide texture without introducing competing flavors. Avoid strongly flavored foods during active tasting, as these will contaminate your palate and obscure the nuances of subsequent pours.
Can I host a whiskey tasting party on a budget?
Absolutely. Focus on finding quality expressions at various price points rather than expensive bottles. Many excellent introductory whiskeys cost between twenty and forty dollars. Consider purchasing airline-style sampler packs or organizing a bottle split with friends to reduce individual costs while still exploring diverse expressions.
What foods should I serve at a whiskey tasting?
Save food pairings for after your structured tasting is complete. Classic accompaniments include dark chocolate, aged cheeses, and roasted nuts. Avoid strongly flavored foods like citrus, coffee, or heavily spiced dishes during the tasting itself, as they interfere with accurate flavor perception.
How do I prevent palate fatigue during a long tasting?
Pace yourself by limiting your flight to five whiskeys maximum, take breaks between pours, stay hydrated with water, and use palate cleansers like plain oatcakes. If you feel your sensitivity diminishing, pause the tasting and resume later with fresh palates. Tasting quality over quantity is the key principle.
Conclusion
Building a whiskey tasting flight at home is one of the most accessible and rewarding ways to explore the rich world of whiskey. You do not need expensive equipment, rare bottles, or professional training to create an experience that educates and entertains. All you need is curiosity, a handful of well-chosen expressions, appropriate glassware, and a willingness to engage all your senses.
The principles outlined in this guide, from selecting whiskies that progress light to bold to mastering the art of nosing and evaluating the finish, provide a framework that serves beginners and experienced enthusiasts alike. As your palate develops and your knowledge deepens, you will find your own preferences emerging, your own tasting vocabulary expanding, and your appreciation for this ancient spirit growing richer with each flight you create.
So gather your friends, prepare your board, and embark on your first home whiskey tasting flight. The journey is as rewarding as the destination, and every pour tells a story waiting to be discovered.